free pattern | fluffy baubles

Nothing says Christmas quite like some fluffy balls. Am I right?
Add some metallic thread and some sequins and you are all set for some snazzy, floofy, Christmas fun.
This pattern is worked for 7cm polystyrene balls but I will update the pattern for more standard sized Christmas baubles just as soon as Darren can be arsed to get the decs down from the loft!

YOU WILL NEED
I used two strands of either Rowan Kidsilk Haze or Drops Kid Silk held together, I have a scrap basket of kid silk from previous projects and I will list out all the colours I’ve used a bit further down this post but any mohair thread will work with this pattern.
I also used a selection of decorative threads including Twilley’s Goldfingering, Anchor Metallic and King Cole Cosmos (so much fabulousness). If you can’t find any of the above in stock this from DMC is similar and in stock right now (end of November 2020).
3.75mm hook.
stitch marker.
PATTERN IN UK TERMINOLOGY
Repeat pattern in between the two * around, beginning each round with a ch1 (this ch1 does not count as a stitch) and ending each round by removing your stitch marker and joining to the first stitch worked with a slip stitch (ss) replacing your stitch marker to note the beginning of the round (BOR).
You can omit the joining ss if you prefer to work in a continuous spiral, both methods work just fine.
Holding two strands together and your 3.75mm hook, ch4 and join to create a loop (you can also magic loop here if that is your preferred method).
Round 1. ch1, 6dc into loop, place marker to show BOR
Round 2. ch1, *2dc into each dc (12dc)
Round 3. ch1, *1dc, 2dc into next dc* (18dc)
Round 4. ch1, *2dc, 2dc into next dc* (24dc)
Round 5. ch1, *3dc, 2dc into next dc* (30dc)
Round 6. ch1, *4dc, 2dc into next dc* (36dc)
Round 7. ch1, *5dc, 2dc into next dc* (42dc)
Round 8. ch1, *6dc, 2dc into next dc* (48dc)
Rounds 9 to 13. ch1, 1dc into each dc around (48dc)
Round 14. ch1, *6dc, dc2tog* (42dc)
Round 15. ch1, *5dc, dc2tog* (36dc)
Round 16. ch1, *4dc, dc2tog* (30dc)
Round 17. ch1, *3dc, dc2tog* (24dc)
At the end of this round place your polystyrene ball into your work and continue with your decreases with the ball in place.
Round 18. ch1, *2dc, dc2tog* (18dc)
Round 19. ch1, *1dc, dc2tog* (12dc)
Round 20. ch1, *dc2tog* (6dc)
Round 21. ch1, *dc2tog* (3dc)
Pull remaining stitches together tightly and work a dc into each stitch to create a slight raised ridge (like the top of a bauble), ch30 and ss into the other side of your ridge to create your bauble loop.
PATTERN IN US TERMINOLOGY
Repeat pattern in between the two * around, beginning each round with a ch1 (this ch1 does not count as a stitch) and ending each round by removing your stitch marker and joining to the first stitch worked with a slip stitch (ss) replacing your stitch marker to note the beginning of the round (BOR).
You can omit the joining ss if you prefer to work in a continuous spiral, both methods work just fine.
Holding two strands together and your 3.75mm hook, ch4 and join to create a loop (you can also magic loop here if that is your preferred method).
Round 1. ch1, 6sc into loop, place marker to show BOR
Round 2. ch1, *2sc into each sc (12sc)
Round 3. ch1, *1sc, 2sc into next sc* (18sc)
Round 4. ch1, *2sc, 2sc into next sc* (24sc)
Round 5. ch1, *3sc, 2sc into next sc* (30sc)
Round 6. ch1, *4sc, 2sc into next sc* (36sc)
Round 7. ch1, *5sc, 2sc into next sc* (42sc)
Round 8. ch1, *6sc, 2sc into next sc* (48sc)
Rounds 9 to 13. ch1, 1sc into each sc around (48sc)
Round 14. ch1, *6sc, sc2tog* (42sc)
Round 15. ch1, *5sc, sc2tog* (36sc)
Round 16. ch1, *4sc, sc2tog* (30sc)
Round 17. ch1, *3sc, sc2tog* (24sc)
At the end of this round place your polystyrene ball into your work and continue with your decreases with the ball in place.
Round 18. ch1, *2sc, sc2tog* (18sc)
Round 19. ch1, *1sc, sc2tog* (12sc)
Round 20. ch1, *sc2tog* (6sc)
Round 21. ch1, *sc2tog* (3sc)
Pull remaining stitches together tightly and work a sc into each stitch to create a slight raised ridge (like the top of a bauble), ch30 and ss into the other side of your ridge to create your bauble loop.
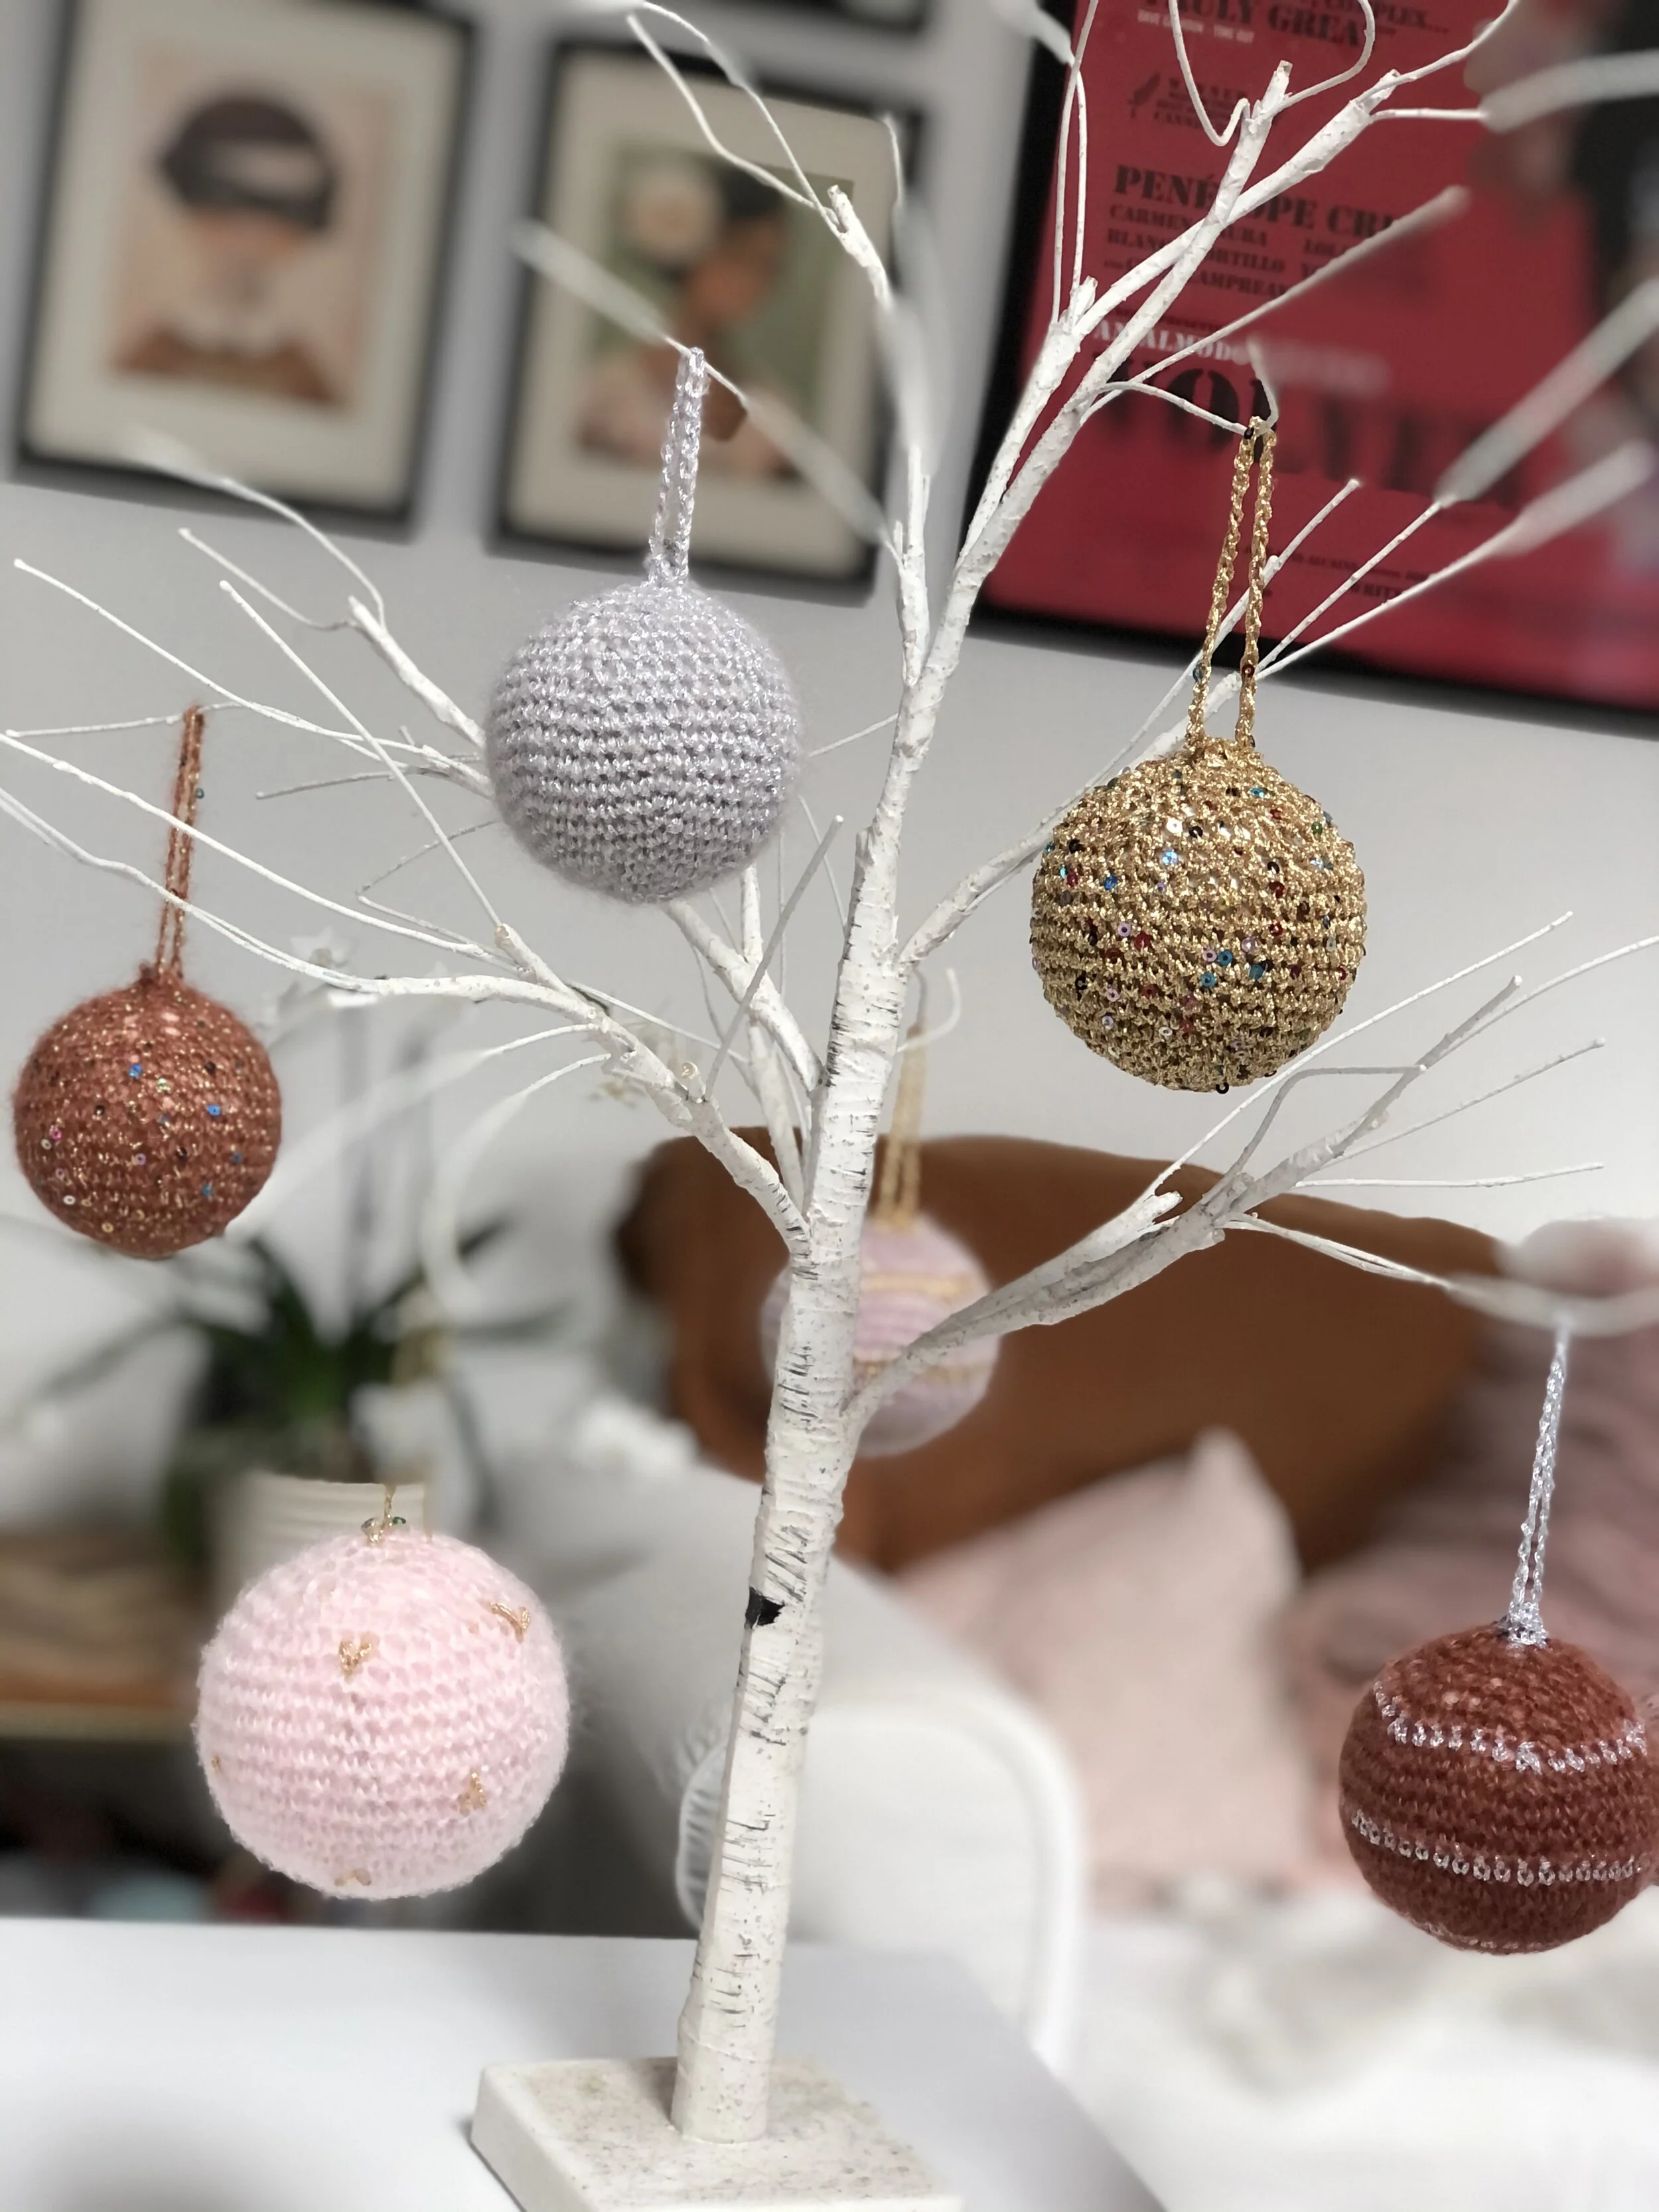
BAUBLE DESIGNS
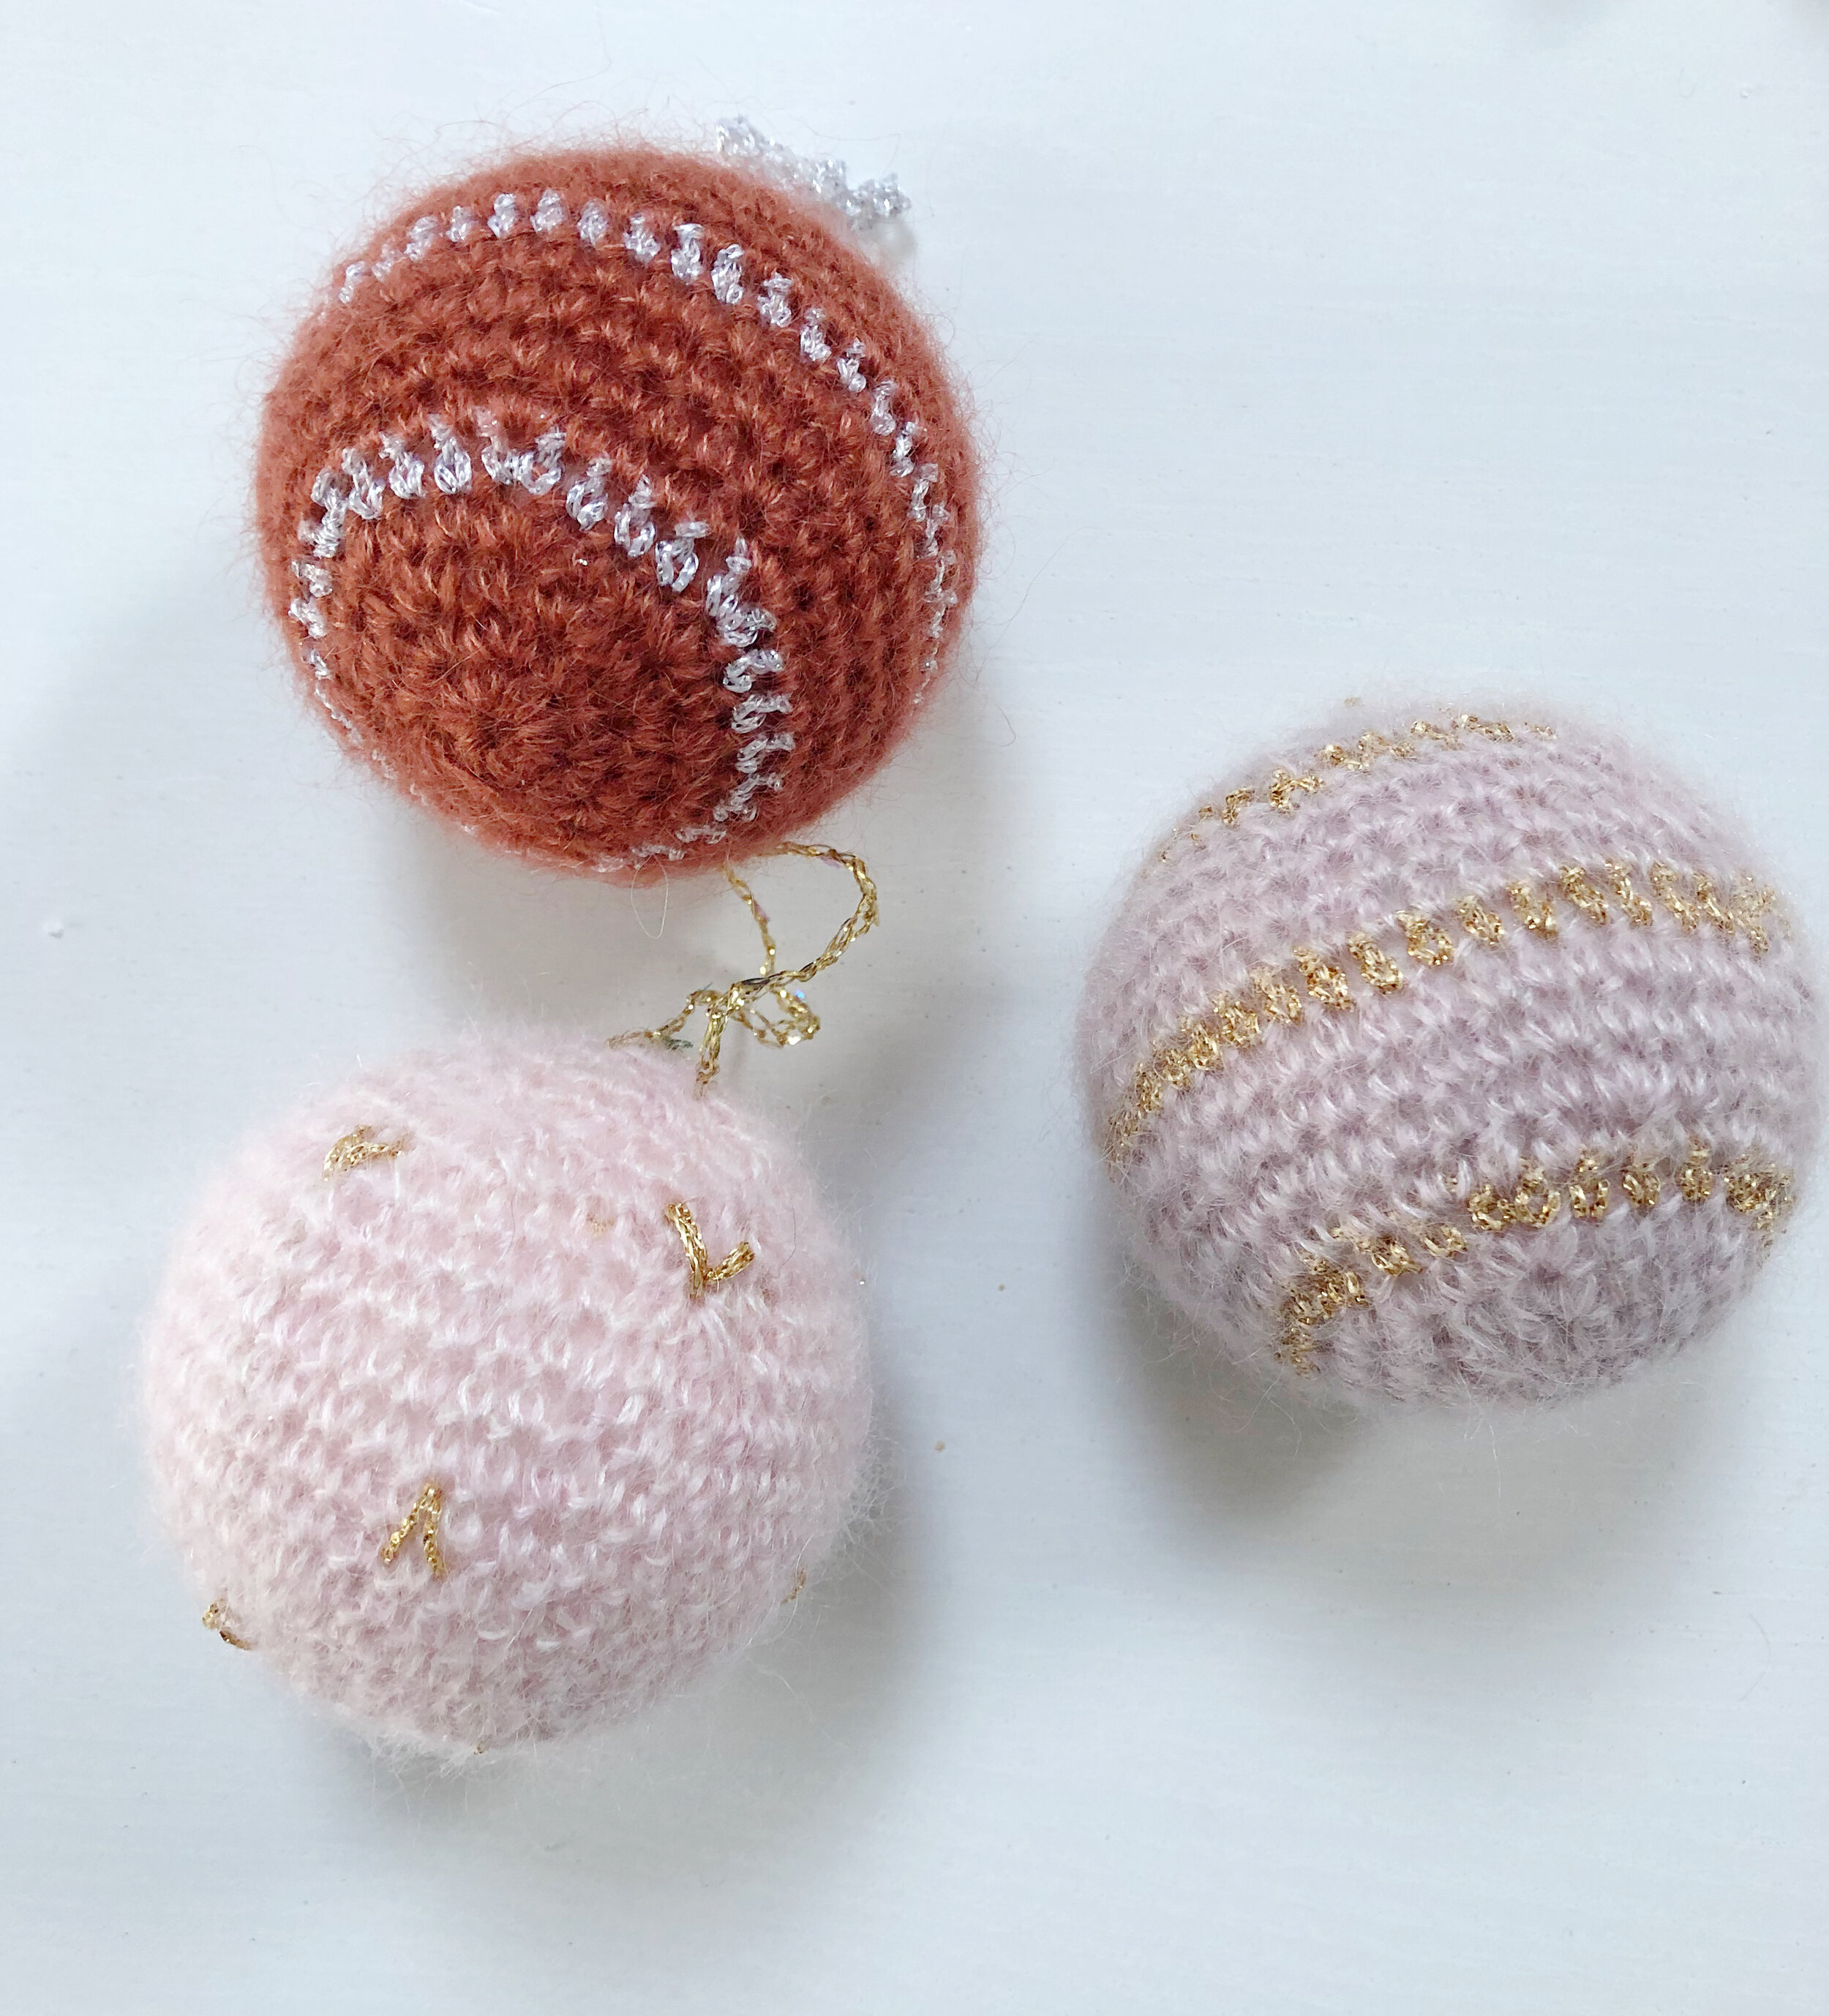
Copper Fluff with silver metallic stripes. | used silver metallic thread on rows 5, 10 and 15 and also to make up the top section (the ridge) of the bauble and the hanging loop. I used Drops Kid Silk in the Rust (33) colourway held double and also Anchor Metallic Thread in Silver (not held double).
Grey Fluff with gold metallic stripes. I used gold metallic thread on rows 5, 10, and 15 and also to make up the top ridge and loop. I used Rowan Kidsilk Haze in the Pearl (590) colourway held double together with Twilleys Goldfingering in Antique Gold (not held double).
Pink Fluff with gold metallic spots. I used Rowan Kidsilk Haze in the Grace (580) colourway together with Twilleys Goldfingering in Antique Gold for the top ridge and loop. I sewed gold spots onto the bauble randomly after I had finished.

4. Gold Sequins. I used Twilleys Goldfingering in the Antique Gold colourway held together with King Cole Cosmos in the Stardust (1099) colourway
5. Silver Sparkle. I used Anchor Metallic Thread in Silver held together with Rowan Kidsilk Haze in the Pearl (590) colourway.
6. Copper Sequins. I used Drops Kid Silk in the Rust (33) colourway held together with King Cole Cosmos in the Stardust (1099) colourway.
You can of course use any combination of fluff, metallic or sequinned yarn you like to create magnificent sparkly, fluffy balls of your own.
Happy crocheting peaches.